Disabling antivirus protection on your computer is generally not advised by experts. However, in certain situations, you might need to temporarily turn off your antivirus software to complete a specific task that the program is blocking. This guide will walk you through the steps to disable your antivirus on Windows temporarily.
Why Temporarily Disable Antivirus?
Before proceeding, it’s essential to understand when it might be necessary to disable antivirus software. The most common reason is to install software that your antivirus mistakenly flags as a threat. In such cases, temporarily disabling your antivirus can allow the installation to proceed. However, this step should only be taken if you are confident about the software’s legitimacy. Ensure that the program comes from a trusted source and is safe to use.
Contents
Sometimes, users may suspect that multiple antivirus programs running simultaneously are causing conflicts on their computer. In such cases, temporarily disabling antivirus programs can help identify the root cause of the issues affecting system performance or functionality.
Steps to Temporarily Disable Antivirus
The process of disabling antivirus software varies depending on the brand and version of the program you’re using. Below, you’ll find general instructions for turning off antivirus software from major providers. Refer to these steps to resolve conflicts or troubleshoot effectively.
- Turn off Windows Defender
- Turn off Avast Antivirus
- Turn off Mcafee Antivirus
- Turn off Avira Antivirus
How to Disable Windows Defender
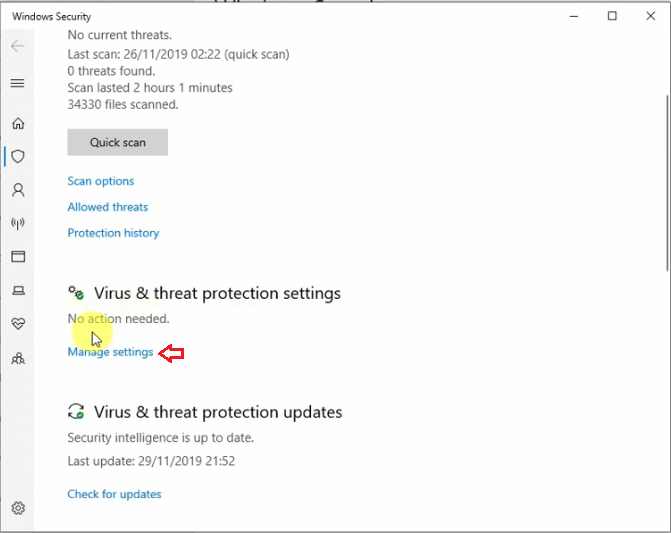
Windows Security is the built-in antivirus protection in Windows 10. To disable it, follow these steps:


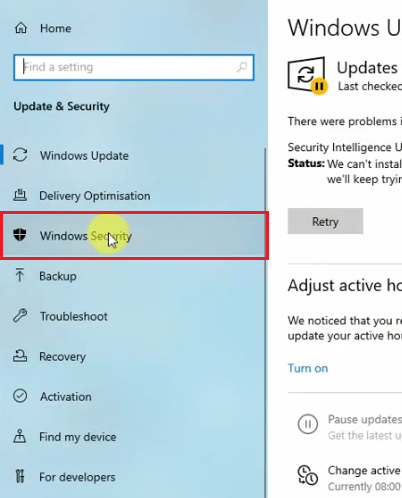
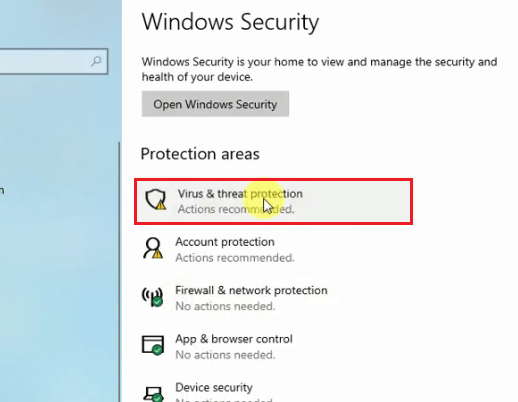
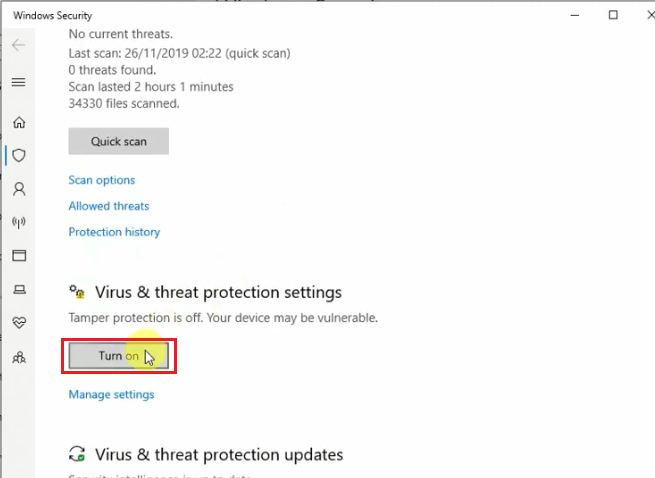
- Next, click on ‘Manage settings’.
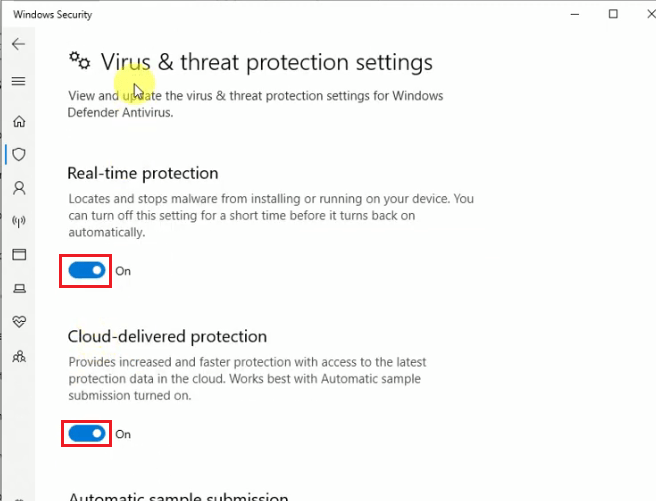
- Now turn-off ‘Real-time protection’ and ‘Cloud-delivered protection’.
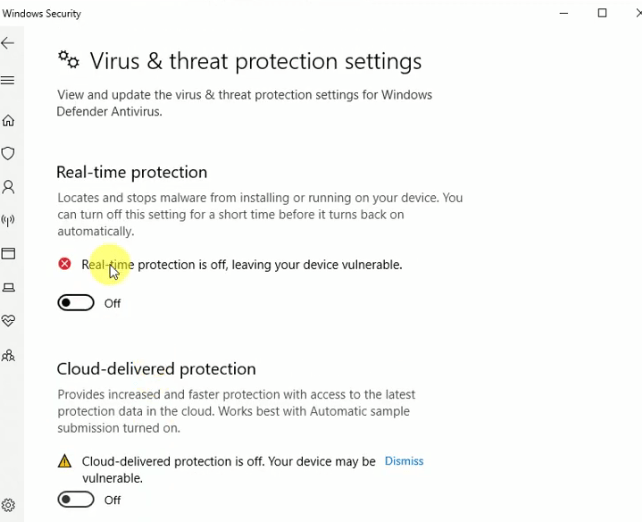
8. Once both protections are turned-off this task is completed. Now you can close all the opened windows.
After disabling Windows Security on your computer, you should move-on to disable 3rd party antivirus programs installed on your computer.
How to Disable Avast Antivirus Temporarily
- Click on the ‘up-arrow’ to show hidden icons on Windows taskbar.
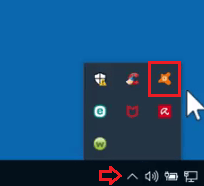
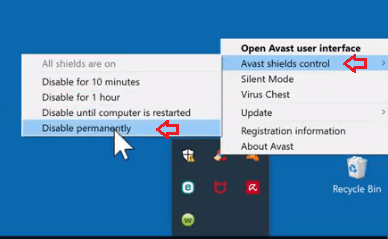
2. Right-click Avast icon and select ‘Avast shields control’. Then, click on ‘Disable permanently’.
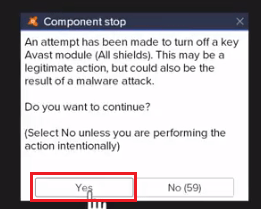
- Dialog box will pop-up asking for the permission to turn-off Avast antivirus, click on ‘Yes’.
That’s it you have disabled Avast antivirus on your computer.
How to Disable McAfee Antivirus Temporarily
- Click on the up-arrow on your Windows Taskbar.
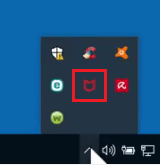
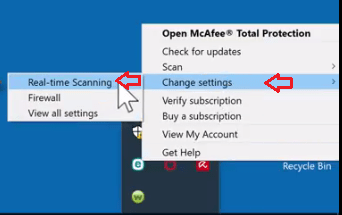
- Right-click on MacAfee icon and select ‘Change setting’, next click on ‘Real-time Scanning’.
- McAfee antivirus will start. In the emerging window click on ‘Turn Off’ button.
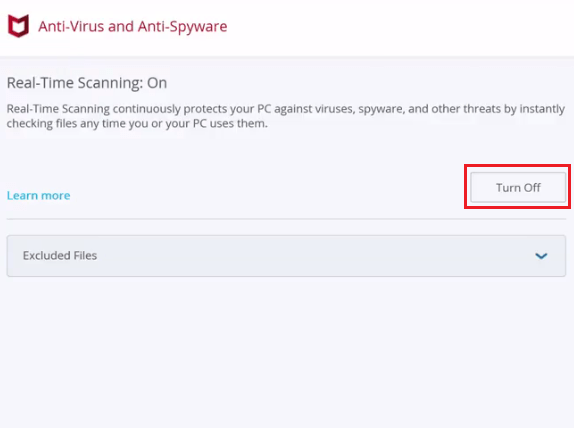
4. In this window, click on the drop-down arrow and select ‘When I restart my PC’. Then, click on ‘Turn Off’ button.
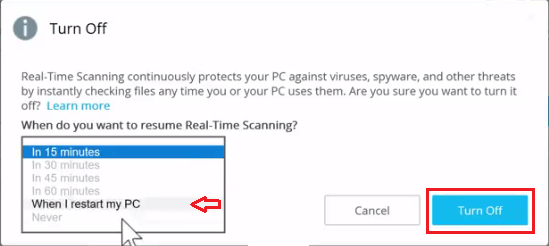
That’s it you have disabled McAfee antivirus on your computer till next restart. For more detail, see this video tutorial.
How to Disable Avira Antivirus Temporarily
- Click on the up-arrow on your Windows Taskbar to show hidden icons.
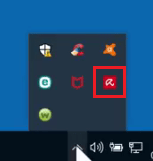
- Right-click on the Avira antivirus icon, and select ‘Enable Real-Time Protection’.
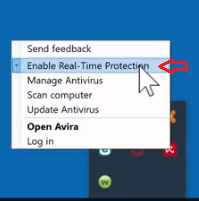
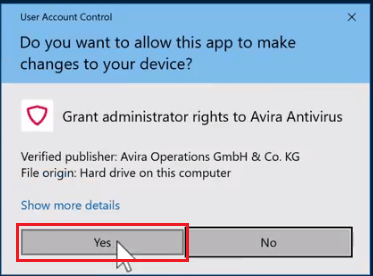
- Dialog box will appear asking for the permission. Click on ‘Yes’.
